Badge Picture Backgrounds
The background of a badge can be a bitmap instead of just colored. The bitmap used can either be one previously prepared, or it can be captured from the video system.

To assign a bitmap background to a badge click with the
left button anywhere in the badge
background area and selecting the  design
toolbar button (or alternatively, right mouse
button anywhere in the badge background area and select Edit Rectangle Parameters from the popup
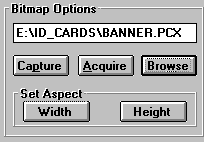
window). Enter the desired bitmap file name in the box or click on
BROWSE to select a file.
The picture will be stretched vertically and horizontally to fill the badge
area. To avoid unwanted distortion, make
sure that the desired bitmap has a similar aspect
ratio to that of the badge.
To capture a bitmap via the video system, click on the CAPTURE button. The normal capture window will open. Compose and save your picture in the usual way as described for capturing a photograph (see Capturing Video Photographs in the Operations chapter). You will be able to save the captured bitmap in a variety of formats. Click on the Save File as Type pull-down to see what types are available for your video capture board. In terms of file size the same picture will be largest if saved as a 24 bit DIB file and smallest as a JPG file. 8 bit BMP and 8 bit PCX formats lie between those two in order of file size.
If you have the TWAIN option
installed, then you can also capture graphics via your TWAIN device, by clicking
on the  Acquire button. This button will not
be available if you do not have the TWAIN support option. Use the TWAIN
interface to compose and save a graphic image in a similar manner to that
described in the previous paragraph.
In some versions clicking the  Acquire button will open a Video for Windows®
capture window.